Question 4: Live Feed POST + Verify
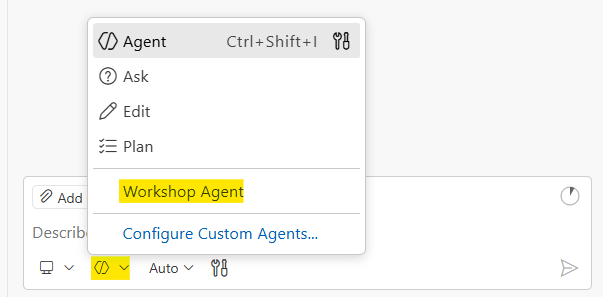
Before you start: Make sure you’ve selected the Workshop Agent in GitHub Copilot Chat. Open QUESTION-4-START-HERE.md in the question-4-live-feed folder and keep it open while you work. This loads the AI context GitHub Copilot needs to help you effectively.
Why This Problem?
This is a practical API integration problem. It reflects a growing trend in technical interviews. Companies are letting candidates use AI tools, but they want to see you solve real-world problems, not just algorithm puzzles. Making API calls, handling authentication, and debugging HTTP requests are everyday engineering tasks.
Companies like Canva and Meta have started allowing AI in interviews because they recognize that AI is part of modern software development. What matters is whether you can actually build things and explain your work.
Read more about AI-assisted interviews:
- Canva: Yes, You Can Use AI in Our Interviews
- Wired: Meta AI Job Interview Coding
- Reddit: Canva’s AI-Assisted Coding Interview
Goal
- Make a POST request to create a new post on the live feed
- Programmatically verify the post exists in the database using the returned ID
A 200 OK response means nothing to stakeholders in the real world. Business users don’t care about HTTP status codes. They care whether the data shows up. Your code must prove the post made it to the database, not just trust the API response. Welcome to real world software engineering!
The Live Feed
Open this URL in your browser to see the live feed:
https://live.segunakinyemi.com
This page displays messages posted by workshop participants in real-time. Your goal is to make your message appear on this board AND verify it programmatically.
WorkshopKey
The API requires a password called the WorkshopKey to authenticate your requests. Without it, your POST and GET requests will be rejected with a 401 error.
Click to reveal the WorkshopKey
7afdc2e7-0483-499e-b1cf-33ec8a7aeb77 Your code will need to include this value in every request. For POST requests, it goes in the JSON body. For GET requests, it goes as a query parameter in the URL.
API Endpoints
POST /api/post
Creates a new post.
URL: https://live.segunakinyemi.com/api/post
Method: POST
Content-Type: application/json
Required Fields:
| Field | Type | Description |
|---|---|---|
Name | string | Your name or alias |
Message | string | What you want to say |
Workshop | string | Workshop name (e.g., “AI Interview Workshop”) |
WorkshopKey | string | The secret key listed above |
Optional Fields:
| Field | Type | Description |
|---|---|---|
Tags | string | Comma-separated tags for your post |
Success Response (200):
{
  "success": true,
  "message": "Posted successfully!",
  "id": "recXXXXXXXXX"
}
Save the id from this response. You need it to verify your post exists.
Error Response (401 - Invalid Key):
{
  "success": false,
  "error": "Invalid or missing WorkshopKey"
}
Error Response (400 - Missing Fields):
{
  "success": false,
  "error": "Name is required"
}
Other missing field errors: "Message is required", "Workshop is required"
GET /api/posts
Retrieves posts for verification. Supports two query modes.
Mode 1: Verify a specific post by ID
Use the id returned from your POST request:
GET https://live.segunakinyemi.com/api/posts?id=recXXXXXXXXX&WorkshopKey=your-key
Success Response (200):
{
  "success": true,
  "post": {
    "id": "recXXXXXXXXX",
    "name": "Qorin Halfhand",
    "message": "First programmer checking in!",
    "workshop": "AI Interview Workshop",
    "tags": ["python", "first-post"],
    "createdAt": "2026-02-09T22:30:00.000Z"
  }
}
Not Found Response (404):
{
  "success": false,
  "error": "Post not found",
  "id": "recXXXXXXXXX"
}
Mode 2: List recent posts by workshop
GET https://live.segunakinyemi.com/api/posts?workshop=AI%20Interview%20Workshop&WorkshopKey=your-key
Success Response (200):
{
  "success": true,
  "count": 12,
  "workshop": "AI Interview Workshop",
  "posts": [
    {
      "id": "recXXXXXXXXX",
      "name": "Qorin Halfhand",
      "message": "First programmer checking in!",
      "workshop": "AI Interview Workshop",
      "tags": ["python"],
      "createdAt": "2026-02-09T22:30:00.000Z"
    }
  ]
}
Mode 3: List recent posts by tag
GET https://live.segunakinyemi.com/api/posts?tag=python&WorkshopKey=your-key
Response: { success: true, count: 5, tag: "python", posts: [...] }
Example Request Flow
Step 1: POST to create your message
{
  "Name": "Qorin Halfhand",
  "Message": "First programmer checking in!",
  "Workshop": "AI Interview Workshop",
  "WorkshopKey": "your-workshop-key-here"
}
Step 2: Save the ID from the response
{
  "success": true,
  "message": "Posted successfully!",
  "id": "recABC123XYZ"
}
Step 3: GET to verify the post exists
GET /api/posts?id=recABC123XYZ&WorkshopKey=your-workshop-key-here
Step 4: Confirm the post data matches
Only print success after verification returns your post.
Your Task
- Write a script that sends a POST request to create a post
- Capture the
idfrom the POST response - Send a GET request to verify the post exists using that
id - Only print success confirmation after verification succeeds
- Handle errors gracefully
Choose Your Tool
This problem uses JavaScript with the fetch API (built into Node.js 18+, no install needed). Using JavaScript here sets you up for Question 5, where you’ll build a frontend form that reuses the same fetch logic.
Read the full API documentation above. The answer to most questions is already here.
Workshop Workflow
1. Plan
Understand the problem before touching code. Think about:
- What does the POST response contain that I need for verification?
- How do I pass the WorkshopKey for GET requests vs POST requests?
- What HTTP status code indicates the post was not found?
Then design your approach:
- Open
post.js(starter file is pre-created with constants and a function skeleton) - Construct the POST request with JSON payload using
fetch - Parse the response and extract the
id - Construct the GET request with
idandWorkshopKeyas query params - Check the verification response
- Print confirmed success or handle failure
2. Prove
Direct AI to write your solution in the starter file. Before running anything, predict what the output will be. Then run the script: it should only claim success after the GET request confirms the post exists.
3. Explain
Walk through your code: how the POST and GET requests work, why verification matters more than trusting a 200 response, and how async/await handles the flow.
Deliverables
Your solution goes in post.js in the question-4-live-feed/ folder. Open that file and write your code there. It already reads BASE_URL and WORKSHOP_KEY from workshop-config.json and has a postMessage() function skeleton to get you started.
Run with:
node post.js
Your script should print:
Posted OK: "<message>" (name=<name>, id=<id>)
Verified: post exists in database
The GET verification step is your test. If your script prints “Verified: post exists in database”, you’ve proven it works.
Extension Challenges
If you finish early:
- Add Tags - Include the
Tagsfield with your school name or something fun - Make it interactive - Prompt for name and message instead of hardcoding
- Add error handling - Handle network failures, timeouts, and unexpected API responses gracefully