
How To Stop Azure Monitor Alerts From Sending Redundant ‘Fired’ and ‘Resolved’ Emails
If you’re getting two emails from your Azure Monitor alert rule and want it to stop, click here for a solution. However, if you’re okay with gradually making your way to said solution, enjoying a context-setting story along the way, keep scrolling.
Story Time
To set the stage, I present to you a story in classic green text fashion, a narrative style cherished by the denizens of the Internet’s back pages.
>be me
>software engineer working on a data project using Azure Synapse Analytics.
>get asked by project management team to send emails when the pipeline has completed.
>simple enough, right? Just use Azure Monitor Alerts. They are so easy. Click here, click there, exportARMBicep template for deployments, done.
>alert goes live, everyone gets two emails.
>PM's start asking questions.
>What have you done?
>Why did we get two emails?
>Which email tells us the pipeline is complete?
>What makes you think it's acceptable to violate the sanctity of our inboxes in such amateur fashion?
>Why are the emails so ugly?
>Can you add pictures?
>Can you change the text?
>panik.jpg
>realize the alert's action group is triggering twice, once for 'Fired' and again for 'Resolved'.
>do research.
>find solution.
>fix problem.
>kalm.jpg
In summary, I needed to send emails when something happened in Azure without annoying my entire management chain, and figured out how to do so. I now share that knowledge with you.
Why Redundant Email Notifications Occur
By default, Azure’s action groups are configured to notify on both state changes for an alert rule, when it fires and when it resolves. This setup ensures thorough communication but can lead to unnecessary email clutter. You’re not alone if you find this annoying, although technically speaking, it’s not a bug. Here are some others who’ve seen the same thing.
Alert is fired twice: first time with “fired”, other on “resolved” monitorCondition
Configuring Alert Rules to Not Send Secondary Resolved Notification
The Solution
If you want to ensure you only get one email from your Azure alert rule, here’s what to do. You’ll need to use something called an alert processing rule, which is different from an alert rule, despite sounding similar.
- Set up your alert rule. I’m going to assume that if you’re reading this article, you already have an alert rule, and it’s causing you problems, so this step is likely done.
- In the Azure Portal, go to
Alerts –> Alert processing rules.
- Click
Createon theAlert processing rulespage.
- Here’s where things get interesting. For the
Scope, you need to select the resource that your alert rule is tied to. In my case, I was monitoring a Synapse workspace, but it was done by picking up data it emitted to a Log Analytics workspace. This meant I needed to attach my alert processing rule to the Log Analytics workspace, rather than the Synapse workspace directly. Your situation may differ, but the general guidance is to choose the resource your alert rule is directly scanning as your scope.
- Now with your scope chosen, apply filters to tie your alert processing rule to the alert rule causing you problems. Under
Scopethere should be aFiltersection with dropdown menus. - Set your first filter to
Alert rule nameand choose the name of your problematic alert rule. - Set your second filter to
Alert conditionand choose eitherFiredorResolved, whichever condition you want to silence (not get an email for). Here’s an example of what this could look like.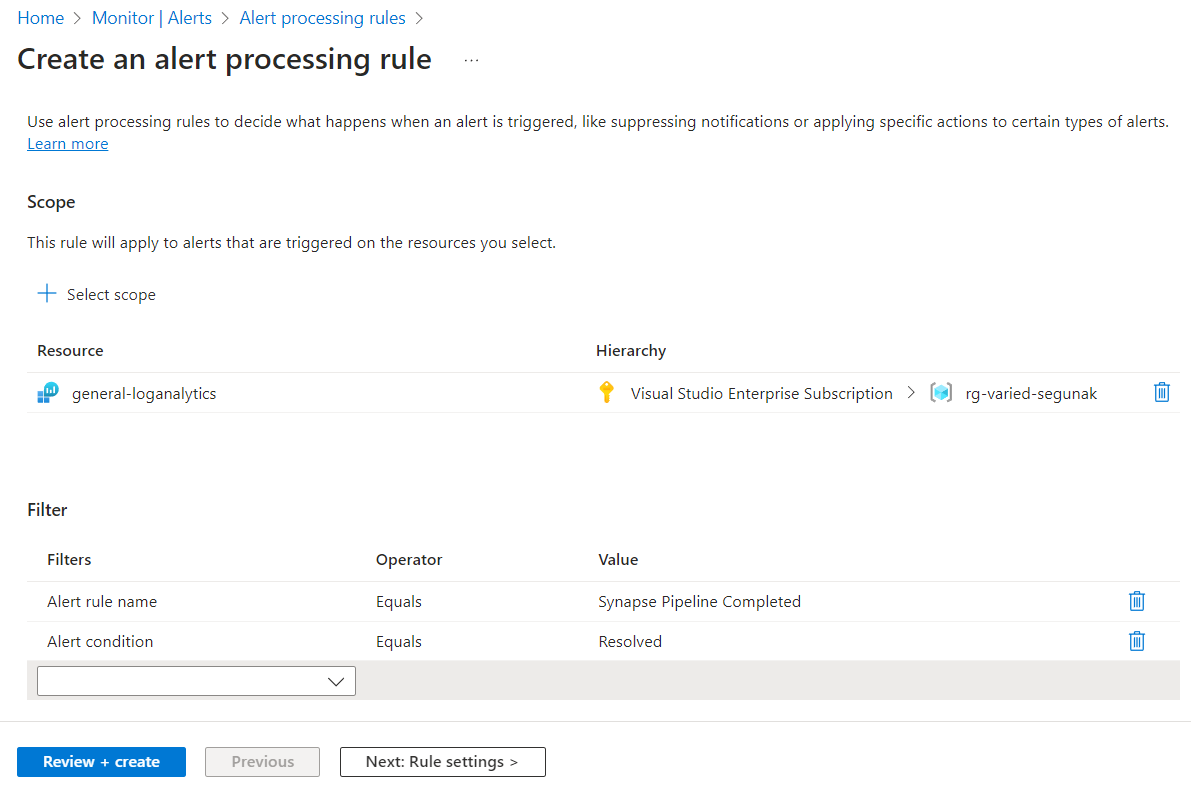
- Proceed to the
Rule settingspage and chooseSuppress notifications, which does exactly what it sounds like. The alert will still fire, but its action groups won’t be invoked, so you won’t receive any notifications when it fires.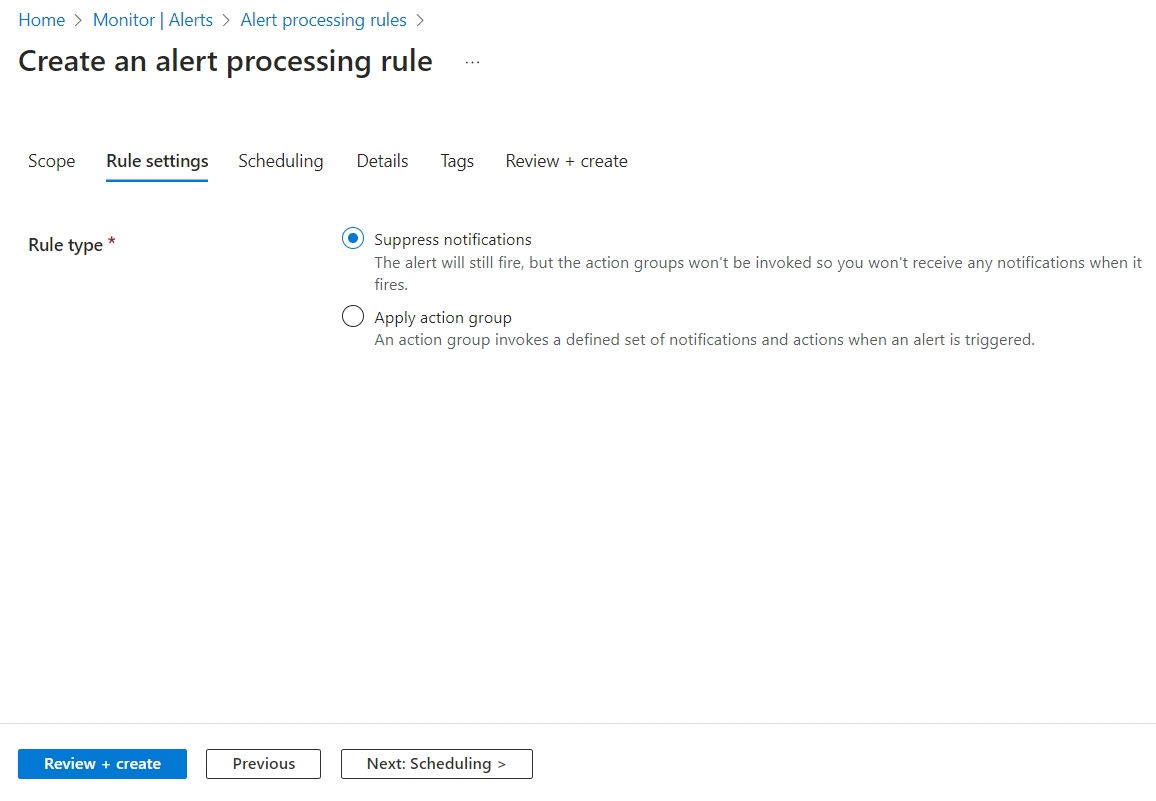
- Proceed to the
Schedulingpage and selectAlwaysto ensure the alert processing rule is always active.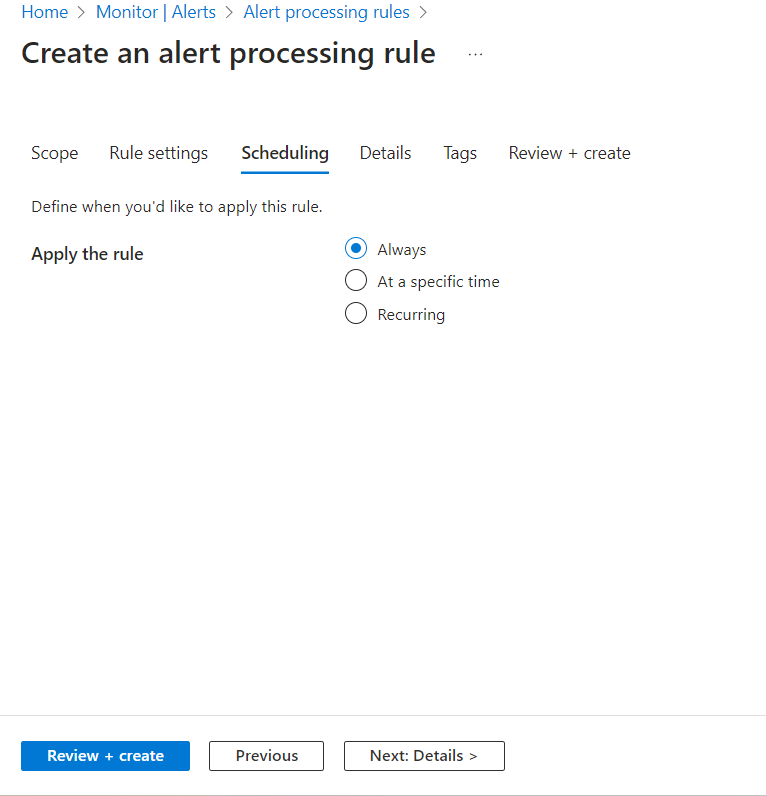
- Proceed to the
Detailspage and select a resource group for your alert processing rule. Give it a sensible name and description.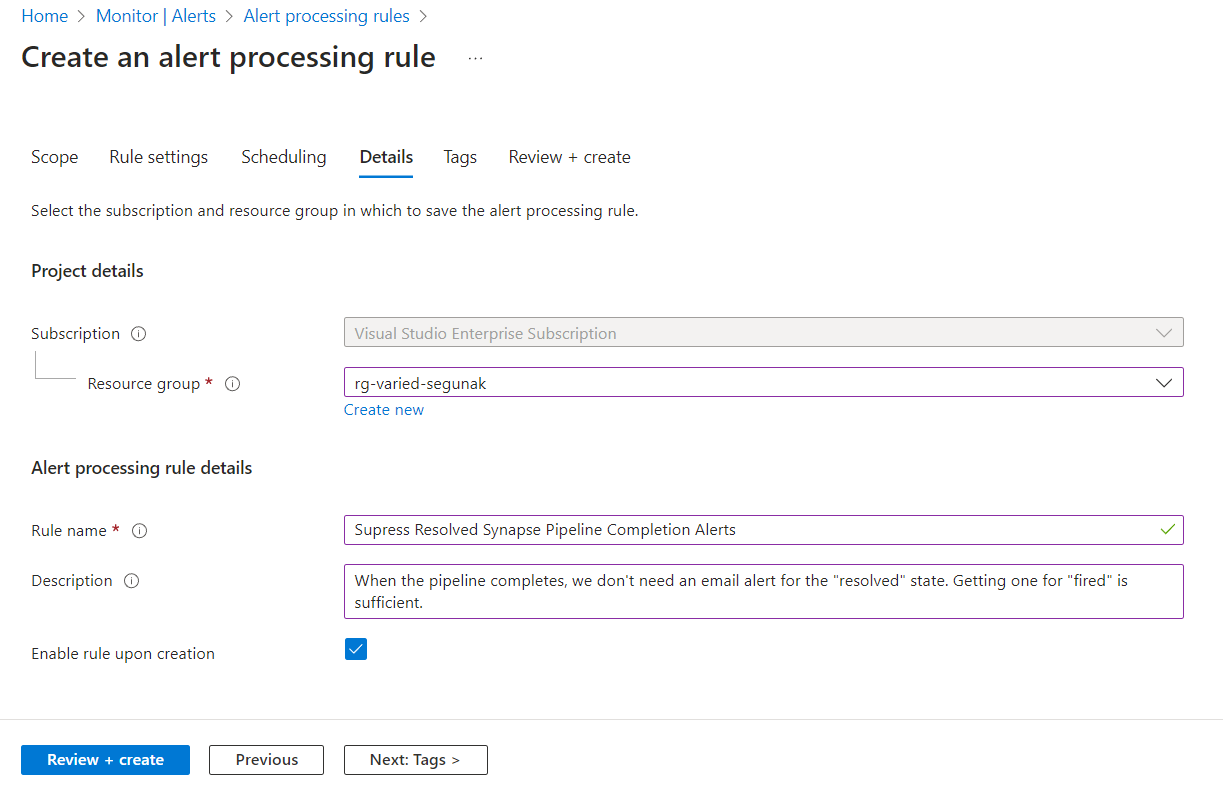
- Proceed to the
Review + createpage and create the alert processing rule. Once created, it should show up on the overview page for all alert processing rules.
- Test your alert processing rule by triggering your alert rule and seeing if you end up getting two emails.
The trickiest part of the instructions above is selecting the correct scope for your alert processing rule. It took me a few tries to get the right configuration that would apply to my Synapse workspace indirectly through the Log Analytics workspace it emits to. If you go through the instructions and are still getting two emails, double-check your scope.
Automating With Bicep Templates
If you manage your Azure resources through code, setting up alert processing rules via Bicep (or ARM, Terraform, etc.) templates is a must for CI/CD. Below is a sample Bicep script to configure an alert processing rule. Here’s the relevant Microsoft documentation page.
resource suppressMainPipelineResolvedAlert 'Microsoft.AlertsManagement/actionRules@2021-08-08' = {
  name: 'Suppress the Resolved or Fired State Of Some Alert So You Only Get One Email'
  location: 'Global'
  properties: {
    actions: [
      {
        actionType: 'RemoveAllActionGroups'
      }
    ]
    conditions: [
      {
        field: 'AlertRuleName'
        operator: 'Equals'
        values: [
          'The Name of the Alert You Are Trying to Suppress When Resolved or Fired'
        ]
      }
      {
        field: 'MonitorCondition',
        operator: 'Equals',
        values: [
            'Resolved
        ]
      }
    ]
    description: 'Write a good description so future people know why you did this'
    enabled: true
    scopes: [
    'The Id of your logAnalyticsWorkspace. You can find this on the overview tab of your workspace in the Azure Portal'
    ]
  }
}